
Inquiry
Form loading...

How to Choose the Right Door Gasket?

Choosing the right Door Gasket starts with the door, not the product catalog. A seal that looks similar may still fail if its profile, material, or compression does not match the opening. Measure the gap at several points. Check the door’s movement, frame condition, and exposure to heat, moisture, or cleaning chemicals. Small differences matter.

“Match the gasket to the gap and the working conditions.” This practical rule reflects advice commonly given by experienced door-sealing technicians. No single profile suits every door. A soft bulb seal may close an uneven gap, while a firmer strip can work better on a stable, regularly used door. Too much compression can make closing difficult. Too little leaves drafts, noise, or dust paths. The fit should feel secure, not forced.

This guide explains how to compare gasket materials, shapes, and installation methods, then check the seal after fitting. A simple paper test can reveal weak spots: close the door on a strip of paper and see whether it pulls free easily. Repeat around the frame. It is not a perfect test, though. Door alignment and latch pressure can distort the result, so inspect those too. A careful choice saves rework, but measurements alone cannot tell the whole story. The door’s daily use matters. So does the installer’s patience.
How to Choose the Right Door Gasket?

Understanding the Purpose and Types of Door Gaskets

How to Choose the Right Door Gasket?

Understanding the Purpose and Types of Door Gaskets

A door gasket forms a flexible seal between a door and its frame. It helps limit drafts, dust, moisture, and noise. On a refrigerator, a sound gasket also helps keep cold air inside. The right choice depends on the door, its surroundings, and how often it is used.

Common types include compression gaskets, which press against the frame when the door closes, and magnetic gaskets, often used on refrigerators. Brush seals can suit sliding doors, where bristles reduce airflow without blocking movement. Materials vary too: rubber and silicone are flexible options, while foam may suit lighter-duty gaps. Check the existing profile, measure the gap at several points, and consider temperature and exposure to sunlight. A seal that looks close may still leave a small leak.

Tips: Close the door on a strip of paper and gently pull it out. If it slides freely, the seal may be weak at that spot. Check corners and hinges, where gaps often hide. Measurements can be a little uneven; that is worth checking twice.

Identifying Your Door’s Size, Design, and Environmental Needs

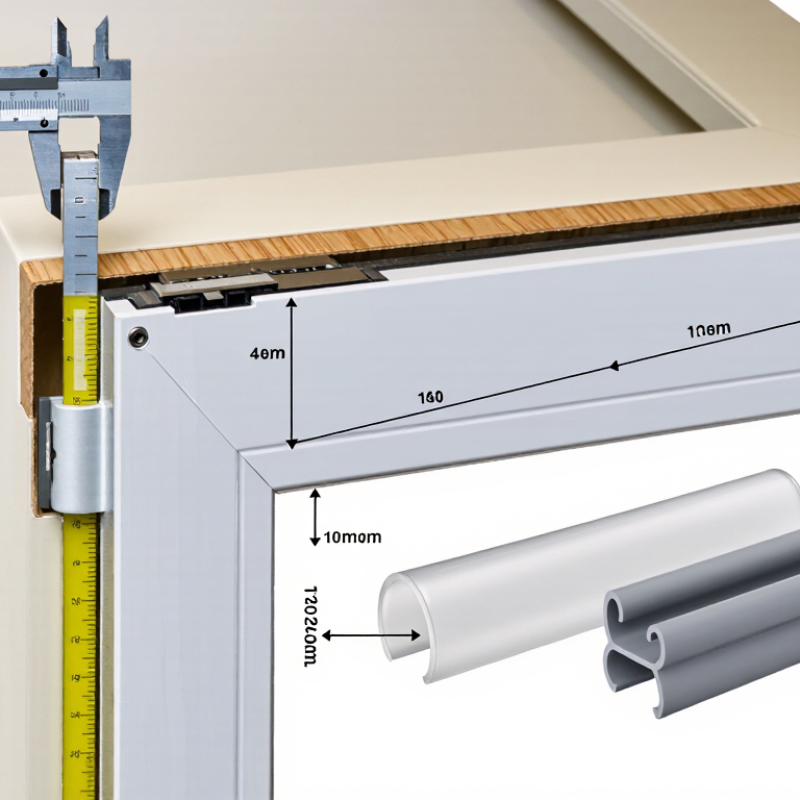
A reliable fit starts with careful measurements, not a guess based on the old seal. Measure the door opening, gasket width, and thickness with a ruler or tape. With the door closed, check whether the seal touches the frame evenly. Look for gaps near corners, where air and moisture often slip through. Measure twice. A warped frame can mimic a gasket problem, so inspect the door before ordering a replacement.

Next, identify how the gasket attaches. Some seals press into a narrow channel, while others use screws or magnetic strips. Check the channel’s shape and note any corners, joints, or unusual bends. A clear photo can help when comparing replacement profiles. Do not assume a similar-looking gasket will fit; small differences can affect how firmly the door closes.

Environmental conditions matter. A gasket exposed to sunlight, rain, or frequent temperature changes may need different material properties than one used indoors. Cold rooms require a seal that remains flexible at low temperatures. For humid spaces, consider resistance to moisture and routine cleaning. Check care instructions and operating conditions, and ask a qualified technician if the door still leaks after installation. Measurements can be frustratingly close, yet still wrong.

Comparing Gasket Materials, Profiles, and Sealing Performance

A door gasket should match the gap, operating temperature, and frequency of use. EPDM suits many exterior doors because it resists weathering and stays flexible. Silicone handles wider temperature swings, but often costs more. PVC is economical, though some formulations stiffen in cold conditions. Bulb profiles compress into uneven gaps; flat strips work better on smooth, consistent surfaces. A gasket that is too thick can stop the latch from engaging.

U.S. Department of Energy Energy Saver guidance estimates that air leakage wastes 25–40% of heating and cooling energy in typical homes. That estimate covers the whole home, not doors alone. Still, a draft at the latch side is a practical sign to inspect the seal. Material labels do not guarantee performance: installation pressure, corner joints, and compression set matter too.

Tips: Close the door on a strip of paper. If it pulls out easily, check that spot. Measure the gap at several points, then choose a profile that seals without forcing the door shut. Small measurement errors happen; recheck before ordering.

Measuring the Door and Checking Gasket Compatibility

A good door gasket starts with careful measurement, not a guess based on the old seal. Open the door and measure its width and height along the gasket’s outer edge. Note the corner shape, retaining tabs, screw holes, or grooves. Check the channel where the gasket sits, too; two seals can look alike but attach differently. Measure twice. A stretched or hardened gasket may no longer match its original size, so measurements alone are not enough.

Compatibility matters as much as dimensions. Check the appliance’s model information against the replacement part’s fit details, then compare the gasket’s profile and attachment method with the existing one. Magnetic seals, push-in seals, and screw-mounted designs are not interchangeable. If the old gasket is brittle, photograph its corners and fastening points before removing it. That small step can prevent confusion later. I have seen careful measurements fail because the seal’s cross-section was overlooked; it is an easy detail to miss. After fitting, close the door on a strip of paper at several points. The paper should resist pulling out, though this test is not a substitute for checking the appliance’s instructions. If the seal buckles or leaves gaps, stop and recheck the fit rather than forcing it.

How to Choose the Right Door Gasket? - Measuring the Door and Checking Gasket Compatibility
Check How to Measure or Inspect Record Compatibility Check
Door opening dimensions Measure the opening width and height from edge to edge. Measure at the top, middle, and bottom, and use the largest reading when checking the replacement's stated coverage. Width: mm or in
Height: mm or in
Confirm the gasket is intended for the specific door or opening size. Do not assume a gasket can be stretched to fit.
Gasket perimeter or length If the gasket is removable, lay it flat without stretching and measure its outside length and width. For a fixed gasket, measure the door's gasket channel around the full perimeter. Length: mm or in
Width: mm or in
Compare measurements with the replacement part's stated dimensions and fitting instructions. Account for corner shape and any specified allowance.
Cross-section profile Inspect the gasket edge-on. Identify its shape, such as a bulb, hollow chamber, fin, or multi-lobed profile. Measure the profile's overall height and width at an undamaged section. Profile height: mm or in
Profile width: mm or in
Shape: describe or photograph
Match the profile and orientation, not just the overall length. Similar-looking profiles may seal or attach differently.
Attachment method Check whether the gasket is retained by a push-in dart, a screw-on retainer, a channel, adhesive, or another fastening method. Examine an accessible corner or manufacturer-provided fitting instructions. Type: record the attachment method
Channel width/depth: mm or in, if applicable
The replacement must use the same compatible attachment arrangement. A matching gasket size alone does not confirm that it will fit the retainer or channel.
Corner and joint construction Inspect the number and shape of corners, molded corner pieces, seams, and any joined ends. Note whether the gasket forms one continuous loop or is supplied in sections. Corners: count and shape
Construction: one piece or sections
Check that the replacement's corner design and joint locations suit the door. Poorly aligned joints can leave gaps.
Door and equipment identification Locate the equipment or door model information on its rating plate, frame, or documentation. Record the complete model and, where listed, the part number of the existing gasket. Model: record exactly
Existing part number: record if available
Use model-specific parts information where available. A model or part-number match is a stronger compatibility check than appearance alone.
Material and operating conditions Identify the required material and the conditions the gasket will face, including operating temperature, moisture, cleaning agents, and indoor or outdoor exposure. Temperature range: check equipment requirements
Exposure: record relevant conditions
Confirm that the replacement material is specified for the application and operating conditions. Do not infer temperature or chemical resistance from appearance.
Seal contact and compression Inspect the door frame for an even contact surface. After fitting, close the door and check that the gasket contacts the frame continuously without being folded, twisted, or excessively compressed. Contact: continuous or gaps noted
Fit: even, twisted, or pinched
Follow the fitting instructions and check the seal around the full perimeter. If the door does not close evenly, recheck alignment and gasket fit.

Assessing Installation, Durability, and Maintenance Requirements

Choosing a door gasket starts with the door, not the product listing. Measure the channel width, depth, and perimeter, then check how the old seal sits when the door closes. A gasket that is too thick can make the latch difficult to operate; one that is too thin may leave a visible gap. Look for uneven compression around corners. Cold air, dust, or a strip of paper slipping through can reveal weak contact. Small clues matter.

Installation requirements vary. Some profiles press into a groove; others need adhesive or fasteners. Clean the surface and remove residue before fitting, because dirt can loosen an adhesive edge. Keep corners smooth, and avoid stretching the material during installation. Stretching is tempting. It can shrink back later. If the door is warped or its hinges sag, replacing the gasket alone may not stop the leak. That detail is easy to miss.

Durability depends on exposure and use. Sunlight, moisture, cleaning chemicals, and frequent slamming can shorten service life, so match the material to the location. Inspect the seal every few months for cracks, hard spots, or flattening. Wipe it with mild soap and water unless its care instructions specify otherwise. Appearance alone can mislead: a clean, flexible seal may still fail at one corner. A quick paper test after installation creates a useful baseline for future checks.