How to Effectively Install Weather Stripping Door Seal for Maximum Energy Efficiency
In the pursuit of achieving optimal energy efficiency in homes, one often-overlooked solution is the effective installation of a Weather Stripping Door Seal. According to the U.S. Department of Energy, up to 30% of a home’s heating and cooling energy can be lost through gaps and leaks around doors and windows. By strategically applying weather stripping, homeowners can significantly reduce energy waste, enhance indoor comfort, and lower utility bills. The American Council for an Energy-Efficient Economy (ACEEE) states that implementing proper weatherization measures, including door seals, can result in savings of 10% to 50% on energy costs annually. As energy prices continue to rise, investing time and resources into sealing these vulnerabilities becomes not just a wise decision but a critical one for both environmental and economic sustainability. Understanding the best practices for installing a Weather Stripping Door Seal will empower homeowners to take charge of their energy consumption and contribute to a more sustainable future.
Choosing the Right Type of Weather Stripping for Your Door Seal Needs
When it comes to enhancing your home's energy efficiency, selecting the right type of weather stripping for your door seals is crucial. According to the U.S. Department of Energy, proper sealing can reduce energy costs by up to 20%, as air leaks account for nearly 30% of heating and cooling energy usage in homes. There are various materials available, including foam, rubber, vinyl, and metal, each having distinct advantages depending on your climate and door type.
To ensure you make the best choice, consider the following tips:
- Assess your local climate. If you live in an area with extreme weather, opt for more durable materials like rubber or metal. They resist wear and tear and provide better insulation.
- Measure the gaps around your doors accurately. Weather stripping should be able to fill these gaps snugly to prevent drafts.
- Consider the type of door you have—exterior doors typically require more robust seals compared to interior doors because they experience greater temperature fluctuations.
Remember, the installation of weather stripping can also improve comfort within your home. A well-sealed door can maintain consistent indoor temperatures, allowing your HVAC system to operate more efficiently. Investing in quality materials and proper installation not only enhances energy efficiency but also contributes to
long-term savings.
Preparing Your Door Surface for Optimal Weather Stripping Adherence
Preparing your door surface for optimal weather stripping adherence is a crucial step in ensuring maximum energy efficiency. To begin with, clean the door thoroughly to remove any dirt, dust, or old paint. A well-prepared surface allows the weather stripping to adhere better, minimizing air leaks that can lead to energy loss. For best results, use a gentle detergent and water solution, followed by a rinse to eliminate any residue.
In some cases, applying a primer can enhance the adhesion of weather stripping materials. Primers create a smooth, even surface that can significantly improve the bond between the door and the weather stripping. This is especially true for metal or wooden surfaces where previous finishes might have been worn down. Once the primer has dried, it’s advisable to inspect the surface again for any imperfections that may need attention before applying the weather stripping. Taking these preparatory steps will not only aid in proper installation but also contribute to the long-term effectiveness of the weather seal, leading to enhanced energy efficiency in your home.
How to Effectively Install Weather Stripping Door Seal for Maximum Energy Efficiency - Preparing Your Door Surface for Optimal Weather Stripping Adherence
| Preparation Step |
Description |
Tools Needed |
Estimated Time |
| Clean the Surface |
Remove dirt, dust, and old weather stripping to ensure a smooth surface. |
Cloth, mild cleaner |
15 minutes |
| Inspect for Damage |
Check for any gaps or damage around the door frame that need repair. |
Screwdriver, wood filler |
30 minutes |
| Measure for Weather Stripping |
Take accurate measurements of the door and frame to cut the weather stripping to the right size. |
Tape measure, pencil |
10 minutes |
| Apply Adhesive |
Apply the appropriate adhesive if your weather stripping requires it for secure attachment. |
Adhesive caulk or tape |
5 minutes |
| Install Weather Stripping |
Carefully position the weather stripping against the door frame and press firmly to ensure adherence. |
No special tools required |
15 minutes |
| Test for Effectiveness |
Check for drafts to ensure the weather stripping is properly installed and seals well. |
Candle or smoke pencil |
5 minutes |
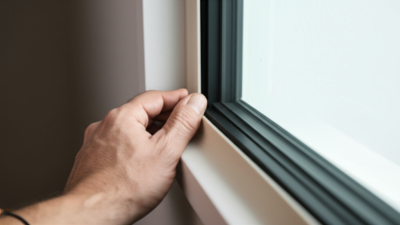
Step-by-Step Guide to Installing Weather Stripping Door Seal
Installing weather stripping on your doors is an essential step toward achieving maximum energy efficiency in your home. According to recent studies, implementing effective weather sealing techniques can save homeowners up to 20% on their heating bills during the winter months. Begin by measuring the length and width of your door jambs and cutting appropriate foam strips to fit. As you apply the foam, roll it down the door smoothly, ensuring a snug fit that blocks out drafts and prevents cold air intrusion.
Moreover, weather stripping is not just limited to traditional doors; it can also be applied to sliding glass doors, which are often overlooked. This type of installation might seem daunting, yet it significantly enhances the overall comfort of your living space by maintaining a consistent indoor temperature. Experts indicate that using weather stripping and caulking together forms a formidable barrier against air leaks, thus reducing energy consumption and contributing to a more sustainable home environment. Taking these proactive measures can transform your energy efficiency while also making your home more comfortable year-round.
Common Mistakes to Avoid During Weather Stripping Installation
When installing weather stripping door seals, avoiding common mistakes is crucial for maximizing energy efficiency. One prevalent mistake is neglecting to measure door frames accurately before purchasing weather stripping materials.
According to industry reports, improperly sized weather stripping can lead to gaps that allow drafty air, causing heating and cooling systems to work harder, subsequently increasing energy bills by up to 20%. Homeowners should take precise measurements and consider the material's flexibility and thickness to ensure a snug fit.
Another common error is overlooking the preparation of the door surface. A clean, debris-free surface is essential for effective sealing. Any dust or old adhesive can prevent the weather strip from adhering properly, resulting in reduced insulation efficiencies. Studies indicate that a well-sealed door can reduce heating costs by 10-15%, emphasizing the importance of a thorough cleaning. Additionally, examining the door's alignment can improve the application of weather stripping, ensuring that the seal remains effective over time. By focusing on these details, homeowners can significantly enhance their energy conservation efforts.
Tips for Maintaining Your Weather Stripping for Long-Lasting Energy Efficiency
Proper maintenance of weather stripping is essential for ensuring long-lasting energy efficiency in your home. According to the U.S. Department of Energy, a well-sealed home can reduce energy bills by up to 20%. Regular inspection and upkeep of your weather stripping can help you keep those savings intact.
One effective tip is to regularly check the seals around your doors and windows for any signs of wear or gaps. If you notice any fraying or splitting, it’s crucial to replace the weather stripping immediately to prevent drafts. Additionally, using a simple dollar bill test—where you slide a dollar bill in the gap; if it slips out easily, you need to replace your weather stripping—can help identify issues before they escalate.
Moreover, cleaning the surface where the weather stripping adheres is vital. Dust and debris can reduce its effectiveness, so a quick wipe-down can make a significant difference. Regularly lubricating metal weather strips with silicone spray can also prolong their lifespan, ensuring they maintain their shape and efficiency in sealing against air leaks. By following these tips and staying proactive, homeowners can enjoy maximum energy efficiency year-round.