Inquiry
Form loading...
Global buyers often treat a Door Bumper as a minor hardware item. That assumption can create expensive problems. A poorly selected bumper may crack under repeated impact, mark a painted wall, or loosen after installation. Small details matter. Door weight, opening angle, mounting surface, temperature, and daily traffic all influence performance.
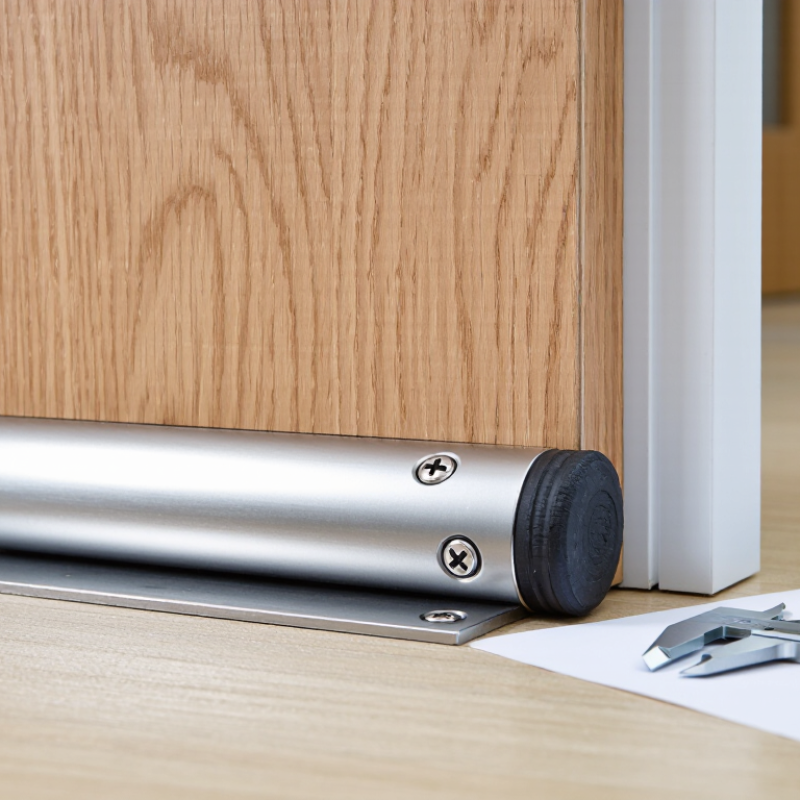
This guide presents ten practical Door Bumper buying tips for international procurement teams, distributors, contractors, and facility managers. It focuses on measurable factors rather than attractive product photos. You will see how rubber hardness, stainless steel grades, screw quality, base diameter, and impact absorption affect real use. A sample inspection might include checking thread alignment, pressing the rubber pad, and measuring the mounting plate with a caliper. Packaging deserves attention too. A bent stem or missing screw can delay an entire installation.
Reliable purchasing also requires clear supplier communication. Buyers should request drawings, material details, test information, production samples, and consistent carton markings. Regional conditions may change the decision. A humid coastal building needs different corrosion protection than a dry office interior. A heavy fire-rated door may require stronger hardware, but compatibility must be confirmed by a qualified professional.
No product fits every project. That is easy to forget. Even experienced buyers can focus too heavily on unit price. The cheaper option may cost more after replacement, labor, and damaged surfaces. These tips support careful comparison, but they cannot replace site measurements or technical review. Consider them a working framework, not a perfect formula.
10 Door Bumper Buying Tips for Global Buyers
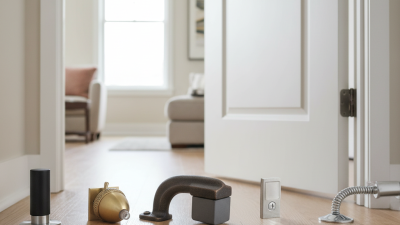
Door bumpers are easier to specify when four details are separated: mounting, material, projection, and duty. Wall-mounted rubber bumpers suit painted walls and ordinary interior doors. Wall-mounted stainless-steel bumpers resist moisture near washrooms and coastal entrances. Floor-mounted brass bumpers add a refined appearance, but they can show scratches. Floor-mounted steel bumpers handle repeated impact in busy corridors. Hinge-pin nylon bumpers install quickly without drilling, although they may fit only compatible hinges.
Adhesive silicone bumpers work for light cabinet or office doors and clean, smooth surfaces. Magnetic steel bumpers hold a door open, but their pull strength needs testing with heavier doors. Recessed low-projection rubber bumpers reduce trip risks where floor space is limited. High-projection cast-steel bumpers protect walls from wide-opening doors. Adjustable hydraulic bumpers control movement in demanding commercial areas, requiring accurate adjustment and maintenance.
Measure the door swing before choosing projection. A short bumper may miss the handle, while an oversized one wastes passage space. Check substrate strength, screw length, surface finish, and cleaning exposure. In my installation experience, matching bumper duty to door weight prevents loose fasteners and cracked surfaces. Still, material labels can mislead. “Heavy duty” does not replace impact testing. I would request load data, installation drawings, and sample pieces before a large purchase. Small samples reveal noise, rebound, finish quality, and real mounting problems.
| No. | Door Bumper Type | Typical Mounting | Common Material Options | Typical Projection | Duty Level | Suitable Door or Location | Key Buying Tip |
|---|---|---|---|---|---|---|---|
| 1 | Wall-Mounted Rubber Bumper | Screwed directly to a wall, skirting board, or door frame | EPDM or natural rubber bumper with stainless steel, carbon steel, or zinc-plated base | 25–45 mm (1.0–1.8 in) |
Medium | Interior hinged doors in homes, offices, hotels, and public buildings | Check the rubber hardness and fixing-hole spacing. A softer elastomer reduces impact noise, while a firmer compound provides greater resistance to repeated contact. |
| 2 | Wall-Mounted Magnetic Door Stop | Base fixed to the wall; magnetic catch engages with a strike plate on the door | Stainless steel, zinc alloy, or brass body with a neodymium or ferrite magnet and rubber contact pad | 45–75 mm (1.8–3.0 in) |
Medium | Doors that need to remain open, including corridor, bedroom, and office doors | Compare the magnetic holding force with the door mass and closer force. Confirm that the catch aligns correctly at the required opening angle. |
| 3 | Floor-Mounted Dome Bumper | Screwed to concrete, tile, wood, or other finished flooring | Stainless steel or brass body with a rubber or elastomer dome | 25–40 mm (1.0–1.6 in) |
Medium | Heavy residential, commercial, and institutional doors with adequate floor clearance | Measure the distance from the door edge to the floor fixing point. Verify that the bumper will not interfere with cleaning equipment or accessibility routes. |
| 4 | Floor-Mounted Wedge Stop | Surface-mounted or placed on the floor near the door swing | Rubber, thermoplastic elastomer, aluminum, stainless steel, or a combination of these materials | 20–60 mm (0.8–2.4 in) |
Light to Medium | Temporary or adjustable control of interior doors and service doors | Choose a high-friction base for smooth floors. For permanent installations, select a screw-fixed version instead of a loose wedge. |
| 5 | Hinge-Pin Door Stop | Installed on the hinge pin of a standard butt hinge | Steel or zinc alloy body with rubber adjustment pads | Adjustable opening range, commonly about 90°–120° | Light | Interior doors where wall or floor drilling is undesirable | Confirm hinge-pin diameter, hinge leaf geometry, and door weight. This type is not normally recommended for high-impact commercial traffic. |
| 6 | Kick-Down Door Holder with Bumper | Screwed to the lower face or lower edge of the door | Die-cast zinc alloy, stainless steel, or plated steel with a rubber foot | Adjustable holding height, commonly 20–100 mm (0.8–3.9 in) |
Medium | Utility rooms, back-of-house areas, shops, and doors requiring manual hold-open control | Inspect the release lever and foot grip. Select corrosion-resistant hardware for wet areas and confirm that the foot does not create a trip hazard. |
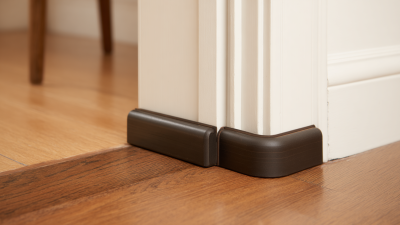
| 7 | Baseboard or Skirting-Mounted Bumper | Fixed horizontally or vertically to a skirting board or trim surface | Rubber or TPE contact element with stainless steel, brass, or plated steel fasteners | 20–40 mm (0.8–1.6 in) |
Light to Medium | Residential and office interiors with limited wall space or decorative wall finishes | Check the trim thickness and screw length. Use concealed or color-matched finishes when appearance is important. |
| 8 | Recessed Floor Door Stop | Installed into a drilled or routed recess in the floor | Stainless steel, brass, or aluminum housing with a rubber impact insert | 15–35 mm (0.6–1.4 in) |
Heavy | Premium interiors, high-use entrances, and locations where a low-profile finish is required | Confirm the required hole diameter, recess depth, drainage conditions, and floor construction before ordering. Installation accuracy is critical. |
| 9 | Overhead Door Stop and Holder | Mounted at the top of the door and frame, usually with an arm or slide channel | Steel or stainless steel mechanism with rubber or elastomer contact components | Opening control commonly from 90° to 110° | Heavy | Commercial, institutional, healthcare, and high-traffic doors | Check door width, weight, closer type, frame condition, and required opening angle. Coordinate the stop with fire-door and accessibility requirements. |
| 10 | Industrial Wall or Dock Rubber Bumper | Through-bolted to a reinforced wall, loading bay, steel frame, or dock structure | Dense molded rubber, recycled rubber, UHMW-PE facing, and galvanized or stainless steel mounting hardware | 75–150 mm (3.0–5.9 in) |
Heavy | Warehouse doors, industrial gates, loading areas, and high-impact service openings | Evaluate impact energy, vehicle clearance, compression behavior, bolt capacity, temperature range, and resistance to oil, weather, and abrasion. |